
Together We Grow
Is our home-to-school connection initiative that is focused on building a strong partnership between families and teachers. Each unit, we’ll share simple ideas that help you not only stay connected to your child’s learning but continue to foster their growth and development with fun, hands-on activities and engaging conversation starters. When we work together, we help your child grow with confidence—at school, at home, and beyond!
Check out these activities and give them a try at home!
“I Like…” Mirror Affirmations

- sticky notes
- pen or marker
- a mirror
This activity is a simple, yet powerful, way to bring learning into your daily routines! With this activity children not only become more familiar with “Magic Words” but they also learn to share what makes them unique and special, identify similarities and differences among others, and build their confidence!
Start by writing “I” and “Like” on two sticky notes.
Stick both to the mirror in a bathroom or bedroom, somewhere your child and you can see it as you get ready for the day or unwind at night.
As you engage in routine activities such as brushing teeth or doing hair for the day take a few moments to pause and do a few positive affirmations together. Each one should start with the phrase “I like…”. Take turns as you each say a few affirmations about yourself and each other.
When you say each one, point to the words on sticky notes, drawing your child’s attention to them and, as a result, building their familiarity of these words by sight!
Favorite Story Retell
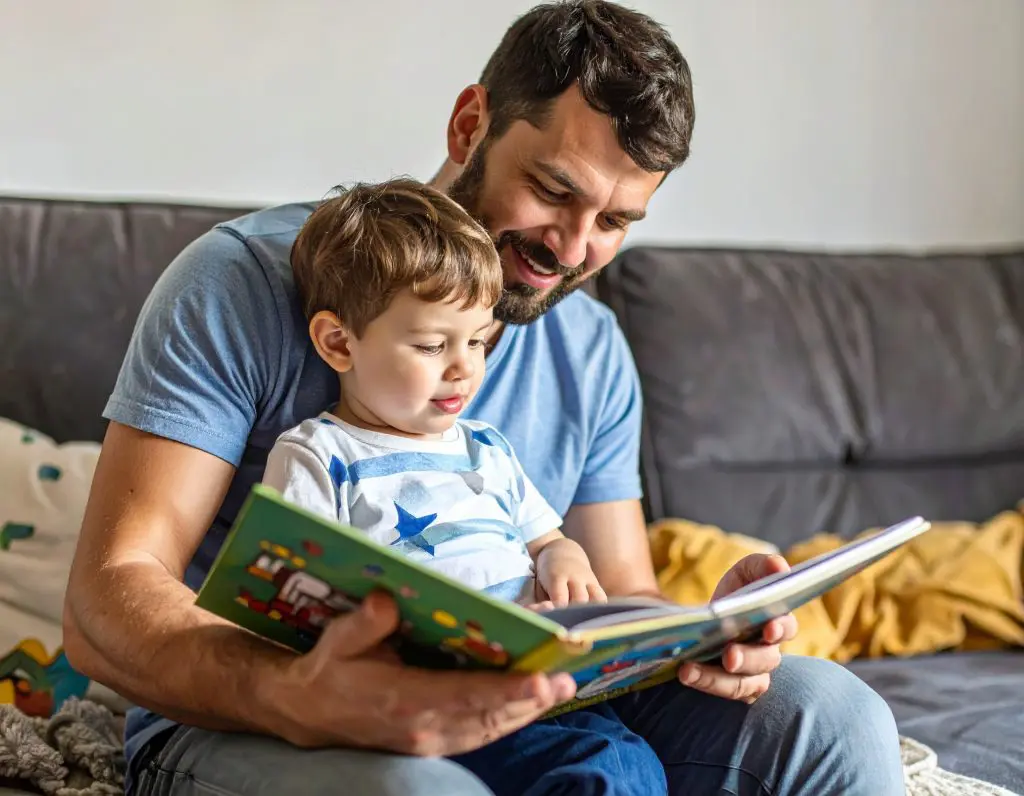
- a favorite story
- a cozy spot to read
This activity is a great way to strengthen your child’s comprehension, memory, and recalling skills.
Find a cozy spot to sit together and read one of your favorite stories.
As you work through the book together, pause and ask some open-ended questions to get your child thinking about what is happening in the book, what their feelings or thoughts are. Use our “Read Aloud Guiding Questions” below as a resource!
When the book is over, ask your child to retell you the story. If they get stuck on a part, prompt them with questions like “Can you tell me what happened after…” or “Can you tell me how the story ended?”.
Continue to use our “Read Aloud Guiding Questions” as a resource to keep the conversation going.
More Activities:
Materials: Toy animals, play dough or flour, paper, pencil
This hands-on investigation invites children to explore how different animals move and leave behind clues. By creating and comparing animal tracks, children practice observation skills, measurement vocabulary, and early scientific thinking.
Spread play dough or a thin layer of flour on a tray. Press the feet of toy animals into the surface to make tracks. Encourage your child to compare the prints—Are some bigger? Longer? Deeper? You can also take this activity outdoors and look for real tracks in snow, mud, or dirt. Have your child draw or trace any tracks they observe and guess which animal made them.
Prompting Questions:
- “Which track looks the biggest? How do you know?”
- “What do you notice that’s different about these two footprints?”
- “Which animal do you think made this track?”
- “Can we measure the tracks with a ruler or with blocks?”
Tips for Success:
- Keep a damp cloth nearby for easy clean-up.
- Encourage children to use math words—big, small, longer, shorter, same—as they compare prints.
- Trace their own footprint to measure!
Materials: Small toy bears or any small counters, a bowl or box (the “cave”), cloth or lid to cover the cave.
This playful math game helps children practice counting, composing and decomposing numbers, and comparing quantities. As bears go “in” and “out” of the cave, children explore how numbers can be broken apart and put back together, building a strong foundation for early addition and number sense.
How to Play:
Place the toy bears in front of your child and introduce the “cave” (a bowl, box, or small container). Tell a simple story: “Some bears are going into the cave to hibernate. Let’s see how many go in!” Hide a few bears under the cloth and leave the rest outside. Kids count the bears they see and try to figure out how many are hidden, discovering part–part–whole relationships through play.
Prompting Questions:
- “How many bears are in the cave? How many are outside?”
- “If I hide two bears, how many do you think are left?”
- “What happens if one more bear crawls inside?”
- “Can you show the number in a different way, maybe with your fingers or drawing?”
Tips for Success:
- Keep numbers small (1–5) to start.
- Add silly storytelling (sleepy bears, hungry bears, noisy bears) to keep the game engaging and fun!
- Have your child create a bear cave using a paper bowl, paint, and other creative materials to add an element of ownership and creativity to the game.
- Read Bear Snores On by Karma Wilson for a fiction literacy connection!
Materials: Paper, crayons or markers, a favorite snowman book, small objects (optional)
This playful rhyming game invites children to listen for sounds, create silly word pairs, and explore how words can sound the same. Through songs, movement, and imagination, children strengthen phonological awareness while having fun with language.
Read a snowman story together such as Snowmen at Night or Sneezy the Snowman. Pause on key words (snow, cold, hat, melt, play) and invite your child to think of words that rhyme. Encourage silly answers—real words or made-up ones both count! You can also write or draw the rhyming words together.
To add movement, try acting out the rhymes. For example, when you rhyme snow with go, pretend your snowman is marching. When you rhyme hat with cat, pretend the snowman puts on a silly hat.
Prompting Questions:
- “Can you think of a word that sounds like snow?”
- “Do hat and cat sound the same at the end?”
- “What silly rhyme could our snowman say?”
- “Can we clap the parts of this word together?”
Tips for Success:
- Celebrate all attempts at rhyming, even silly or made-up words build skills.
- Repeat favorite rhymes often to help children hear sound patterns.
- Keep it playful and short. Stop while it’s still fun!
Materials: 10 small blocks, cups, or cotton balls (snowballs), a small snowman toy or paper snowman, a cup or bowl
This playful subtraction game helps children begin to understand “taking away” in a concrete, hands-on way. By physically removing objects, children can see and count what remains, building early subtraction skills through play.
How to Play:
Start by placing a small group of snowballs (up to 10) in front of your child and count them together. Explain that the snowman is starting with that many snowballs. Then, gently “melt” or knock some snowballs into the cup or bowl. Count how many were taken away, then count how many are left. Repeat the game with different numbers, letting your child do the knocking and counting. You can make it extra fun by telling a simple story: “The snowman had 6 snowballs. Oh no! 2 melted! How many are left?”
Prompting Questions:
- “How many snowballs did we start with?”
- “How many did we knock away?”
- “How many are left now?”
- “What happens if we take away one more?”
Tips for Success:
- Keep numbers small and manageable (1–10).
- Encourage your child to count out loud as objects are removed.
- Use fingers, objects, or drawings to help show their thinking.
- Celebrate effort and exploration. Getting the idea matters more than the answer!
Materials: Flashlight, small toy or stuffed animal, wall or floor space, measurement tool (blocks, paperclips, string, etc)
This hands-on shadow activity helps children explore light while also building early measurement skills. As children create and observe shadows, they learn to compare size, length, and position.
Use a flashlight or sunlight to make shadows with toys, blocks, or your child’s hands. After noticing how the shadow changes when the light moves closer or farther away, introduce simple measurement tools. Children can use linking cubes, paper clips, string, or even their hands/feet to measure how long the shadow is. Line the objects up from the top of the shadow to the bottom and count together.
Talk about math words like longer, shorter, bigger, smaller, near, far, and measure. You can record results by drawing the object and writing the number of cubes it took to measure the shadow.
This playful exploration helps children see that math is a tool we use to understand what we observe in the world around us.
Prompting Questions:
- “What happens to the shadow when the light is close?”
- “Is the shadow bigger or smaller now?”
- “What happens if we move the toy?”
- “Can you make a tiny shadow? A giant one?”
Tips for Success:
- Use math words like bigger, smaller, longer, shorter.
- Let your child experiment freely.
- Try using your hands to make shadow shapes too!
Materials: Just your eyes, a window or outdoor space, paper, crayons/markers
This simple observation activity helps children notice how the sky changes throughout the day. By looking closely, children build science skills like observing, describing, and comparing.
Look at the sky together in the morning, afternoon, and evening if possible. Talk about colors, light, clouds, and what you see. Invite your child to draw what the sky looks like at different times of day. Invite your child to draw the sky at different times of day, then add literacy by labeling parts of the picture. Encourage them to write the sounds they hear at the beginning of words. It’s perfectly okay if sun is written as s or cloud looks like cw. This is how early writing skills grow!
Prompting Questions:
- “What do you notice in the sky right now?”
- “Is the sky bright or dark?”
- “Do you see the sun, clouds, or moon?”
- “How does the sky look different from earlier?”
Tips for Success:
- Even one observation a day builds awareness.
- Use descriptive words like bright, cloudy, blue, dark, glowing.
- Let your child lead what they notice. There are no wrong answers!
- Keep these observations in a “journal” for children to notice patterns over time.
Materials: Bean seed, cup, soil, water, paper, crayons/markers
Instructions:
Plant a seed together and observe it daily. Talk about what plants need to grow — sunlight, water, soil, and time. Invite your child to draw the plant every few days and notice what has changed. Add literacy by labeling parts of the plant and stretching the sounds in words. It’s perfectly okay if leaf is written as lf or plant begins with p. This is how early writing develops!
Prompting Questions:
- “What do you notice today?”
- “What changed from yesterday?”
- “What does the plant need to grow?”
- “What do you think will happen next?”
Tips for Success:
- Check the plant at the same time each day.
- Use descriptive words like tiny, taller, green, sprouting.
- Let your child lead observations.
Materials: Paper, crayons/markers, small objects (beans, cereal pieces, coins, or buttons)
This playful math activity helps children practice combining and taking away while connecting to our plant and weather investigations. This hands-on game helps children see that math is something we use to understand the changes happening around us!
Instructions:
- Draw a simple flower with a number in the center (for example, 5). Place that number of small objects (petals or “raindrops”) around the flower.
- For Drip, Drop, Add, pretend it is raining. Add a small handful of “raindrops” to the flower and count how many there are altogether.
- For Petal Pick Subtraction, start with a full flower. Gently “pick” or remove some petals and count how many are left.
Encourage your child to physically move and count each object to strengthen one-to-one correspondence.
Prompting Questions:
- “How many did we start with?”
- “What happens when we add more?”
- “How many are there altogether?”
- “What happens when we take some away?”
- “How many are left?”
Tips for Success:
- Let your child choose the starting number.
- Use math words like add, take away, more, fewer, altogether, left.
- Encourage them to explain how they figured it out.
- Keep numbers small (1–10) for confidence and accuracy.
Materials: Simple recipe, ingredients, measuring cups/spoons, mixing tools, paper, crayons/markers
Instructions:
Follow a simple recipe together (such as making a snack or drink). Invite your child to help measure, pour, mix, and count ingredients. Talk through each step and sequence of the recipe. Add math by counting scoops and comparing amounts (more/less), and literacy by having your child draw or “write” the steps of the recipe using pictures and beginning sounds.
Prompting Questions:
- “What do we need first?”
- “How many scoops should we add?”
- “What happens if we add more or less?”
- “Can you tell me the steps we followed?”
Tips for Success:
- Choose simple, short recipes with clear steps.
- Encourage your child to describe what they see, smell, and taste.
Materials:
Hands (for clapping) or objects for tapping (table, blocks, pots/spoons)
Instructions:
Clap or tap a simple pattern and have your child listen, repeat, and count the sounds. Start with small numbers and gradually increase. You can also invite your child to create their own sound patterns for you to repeat. Connect to math by counting how many sounds they hear and comparing sets (more/less), and to literacy by linking sounds to syllables in words (clapping out names or simple words).
Prompting Questions:
- “How many sounds did you hear?”
- “Can you repeat the pattern?”
- “Was that more or less than before?”
- “Can we clap the sounds in your name?”
Tips for Success:
- Start slow and keep patterns simple.
- Use familiar words (names, foods) for syllable clapping.
- Turn it into a game by switching roles and letting your child lead.
Materials: Paper or cloth bag, small household objects (cotton ball, spoon, toy, sponge, rock, etc.)
Instructions:
Place one object at a time inside the bag without your child seeing it. Have your child reach in, feel the object, and describe what they notice before guessing what it is. Encourage them to use descriptive words and talk through their thinking. Add literacy by having your child draw and label the object after revealing it, stretching sounds as they write.
Prompting Questions:
- “What does it feel like?”
- “Is it soft, hard, rough, or smooth?”
- “What do you think it could be?”
- “What clues helped you guess?”
Tips for Success:
- Start with very different textures to build confidence.
- Encourage descriptive language, even if guesses are incorrect.
- Let your child take turns choosing objects.
Materials: toy cars, marker, cardboard box, dot stickers or small strips of paper, painters tape *, chalk *
This activity is a great way to strengthen name and letter recognition as well as sequencing skills as they practice spelling their names while driving cars!
First, set up your parking garage:
-Using your marker, draw lines (aka parking spaces) for each letter in your child’s name along the bottom of your cardboard box. Ex. if your child has 5 letters you will need five “parking spaces”.
-Within each parking space place one dot sticker (or tape down a strip of paper) with the letter(s) of their child’s name. Each letter should have its own space!
Next, it’s time to set up your cars:
–Place a dot sticker (or tape down a small piece of paper) on the back of each car and write different letters on each one. Make sure you’ve got enough letters to make it possible to spell your child’s name.
Now it’s time to play!:
Set materials out in your child’s favorite play space and invite them over to explore.
Encourage them to drive around cars as they work to manipulate them into their assigned “parking spaces”.
As they drive each letter, ask them to practice identifying each one and the different sound(s) they make.
- What letter did you find?
- Can you tell me what sound that letter makes?
- Can you think of a word that starts with that letter?
- What spot in your name does that letter belong in? (Ex. is it the first or last letter?)
Optional additions to this activity:
- Use painters’ tape to make roadways on various play surfaces. Encourage children to follow the different pathways to find their parking spaces. Use directional terms and words to guide them along.
- Take this activity outside and create parking spaces and roadways using chalk!
- Feel like your child has mastered their name already?! Create this same experience using familiar words such as names of pets, family members, friends, and familiar places.
Materials: Your child’s favorite book, basket or bin, small toys like animals, people, or figurines, Household objects or blocks to use as props or settings, Felt pieces, fabric scraps, or a story mat to create a storytelling stage
This activity builds comprehension, sequencing, and storytelling skills while making reading even more fun! Don’t forget to take photos and share your storytelling fun with us by tagging your basket!
Create a special Storytelling Basket at home to bring your child’s favorite books to life! Have them join you in this experience. Gather small toys, figurines, or household items that match the characters and settings from books you read together.
After reading your child’s favorite book together, invite them to retell the story using the toys and props from the basket. Spread out the felt or fabric as a stage and encourage your child to act out the characters and scenes. This helps them remember and explain the story in their own words. For example, if you read “The Three Little Pigs,” your child can use toy pigs and blocks to build houses and act out how each pig built a different home. They can show how the wolf tries to blow the houses down and how the pigs work together in the end.
Prompting Questions:
- “Who are the main characters in the story?”
- “Where does the story take place?”
- “What happens first, next, and last?”
- “How did the characters solve the problem?”
- “What was your favorite part?”
Suggestions:
- The Three Little Pigs – Use small pig and wolf toys if you have them or substitute with any small animal figures, blocks, or even paper cutouts to act out the story. You can use building blocks, LEGO, or cardboard pieces to create the pigs’ houses.
- Goldilocks and the Three Bears – Use bear figurines if available, or stuffed animals and dolls. Household items like bowls, spoons, and chairs can represent the bears’ belongings and help retell the story.
- The Tiger Who Came to Tea – Gather toy animals or stuffed tigers if you have them. Use small cups, plates, and pretend food items like plastic fruits or snacks to recreate the tea party.
- We’re Going on a Bear Hunt – Use natural items like leaves, sticks, or rocks collected from outside, or toy animals and household objects to recreate the different settings and actions from the story.
- The Very Hungry Caterpillar by Eric Carle – Use toy insects or small plastic bugs, or use real or pretend food items like pieces of fruit, crackers, or cereal to retell the caterpillar’s eating journey.
- Dear Zoo – Use toy animals like lions, elephants, dogs, and other common zoo animals. If you don’t have toys, cut out pictures from magazines or print animal pictures. Place them in small boxes or envelopes to mimic the story’s surprise parcels.
Materials: Any picture book (wordless books work great, too!), cozy reading spot, reading partner
Picture walks help children develop early reading comprehension, storytelling skills, and vocabulary, all while practicing cooperation and sharing ideas with others.
Choose a picture book and sit together with your child to look through the pages without reading the words. Talk about what you see in the pictures and ask questions like, “What do you think is happening?” or “What do you think will happen next?” This encourages your child to make predictions and practice telling stories based on the images. After exploring the pictures, you can read the book together to see if your guesses were right.
Prompting Questions:
- “What do you see happening in this picture?”
- “How do you think this character feels?”
- “What do you think will happen next?”
- “What makes you think that?”
- “Does this remind you of anything we’ve done or seen?”
Tips for Success!
- Let your child take the lead—follow their interests and observations.
- Use expressive voices and show enthusiasm for their ideas.
- Revisit the book later and try a picture walk again to see if their thinking has changed!
Materials: Small objects like buttons, coins, cereal pieces, or LEGO bricks (about 1 to 5 items), small cup, bowl, or container to cover the objects
This game helps your child practice counting, memory, and number sense in a fun and interactive way using things you already have at home!
Place a few small objects on the table and let your child quickly look at the group for a few seconds. Then, cover the objects with the cup or bowl so they can’t see them anymore. Ask your child to recreate the same number of objects from memory using items you have around the house. You can make it easier or harder by changing how many objects you show or how long you let them look.
Questions:
- “How many did you see?”
- “Can you count how many?”
- “What helps you remember how many there were?”
- “What would happen if we added one more?”
- “Can you show me one less?”
Materials: Chalk, sidewalk/driveway
This chalk map activity helps children learn about their community by creating and exploring familiar places while practicing reading and writing signs or logos. It also encourages physical movement and builds early map skills through fun, imaginative play!
Grab some sidewalk chalk and head outside with your child to create a map of your neighborhood or community on the driveway or sidewalk. Start by drawing roads and pathways, connecting places your child knows like the park, library, or grocery store. Encourage them to add special spots, like a Starbucks drive-thru or their favorite local shop, and include logos or signs they recognize.
As you draw and explore together, talk about the names of each place and invite your child to write environmental print, like store names, street signs, or logos right on the chalk map. This fun activity helps children understand maps, recognize familiar places, and practice writing important words they see every day!
Optional: Once the map is complete, your child can scooter or ride their bike around the “roads” you’ve drawn, driving through their town just like real community members do!
Prompting Questions:
- “What places in our neighborhood should we add to our map?”
- “How do people use these places every day?”
- “Can you tell me about your favorite place on the map? Why do you like it?”
- “What signs or logos do you see at your favorite places? Let’s write them on the map”
Tips for Success!
- Take a drive around your neighborhood prior to map-making! Have your child point out important places and signs they want to add.
- Once the map is complete, your child can scooter or ride their bike around the “roads” you’ve drawn, driving through their town just like real community members do!
Materials: Toilet paper or paper towel tubes (2), tape, paper, basket or small bin, small objects, wall/back of shelf/ shoebox
The “Adding Machine” activity helps your child explore basic addition by dropping small objects into two tubes and watching them combine. It’s a fun, hands-on way to build early math skills and encourage curiosity at home!
Find two empty toilet paper or paper towel rolls and tape them diagonally on the back of a shelf, wall, or in an open shoe box. Make sure the rolls angle down into a cup, bin, or basket below.
Between the two rolls, stick a big plus sign (+) to show it’s all about adding. Now, your child can drop small toys, pom-poms, or coins into each roll and watch them roll down into the container, helping them see how adding two groups together works in a fun, hands-on way!
Prompting Questions:
- “What do you notice when you put different amounts into each roll? “
- “How many objects did you put in total? How do you know?”
- “Can you draw a picture showing what you did with the adding machine?”
- “How many different ways can you make the same total number?”
- “Can you guess how many objects are inside without looking? How will you check?”
Here are some easy, everyday objects you can use for the “Adding Machine”:
- Pom-poms or craft balls
- Buttons
- Small coins (like pennies or dimes)
- Cheerios or other small cereal pieces
- Lego bricks or small building blocks
- Beads
- Dry pasta pieces (like macaroni)
- Mini erasers or small toys
Materials: Felt letters, baking tins or muffin trays, name cards
This playful alphabet activity helps children practice letter recognition, spelling, and early writing skills while engaging in imaginative, hands-on play. Children “bake” names by placing movable letters into the trays in the correct order, then “serve” their cookie creations to friends, combining literacy learning with social interaction and fun!
Set up a baking station with muffin trays or baking tins and felt letters. Write your child’s name, a friend’s name, or simple words on name cards. Encourage your child to select the letters needed and place them in order in the trays, just like baking cookies. Once the names are “baked,” children can share their creations, practice saying the letters aloud, and even arrange the letters to form new words.
Prompting Questions:
- “Which letters do you need to bake your name?”
- “Can you find the first letter of your friend’s name?”
- “What word can we make if we mix these letters together?”
- “How many letters are in your name? Let’s count them like cookies!”
Tips for Success:
- Encourage children to say each letter as they place it in the tray to strengthen letter-sound connections.
- Use the activity as a social experience by having children “serve” their letter cookies to family members.
- Extend the activity by having children write or trace the names they baked on paper to connect hands-on play with writing practice.
Materials: Playdough, cookie cutters in various shapes (optional), rolling pins, small trays or plates
This activity helps children recognize and describe 2D shapes, build fine motor skills, and explore creativity while making “cookies” with playdough. Children use cookie cutters or their hands to shape the dough into different forms, then sort, count, or decorate their cookies to reinforce math and literacy concepts.
How to Play:
- Roll out playdough on a flat surface.
- Use cookie cutters to create shapes such as circles, squares, triangles, and stars.
- Encourage children to name each shape as they cut it out and talk about its attributes, like the number of sides or corners.
- Sort the cookies by shape, color, or size onto small trays or plates, or create patterns using the cookies (e.g., circle–triangle–circle).
- Invite children to design their own cookie “recipes” by arranging shapes into creative patterns, pictures, or imaginary desserts.
Prompting Questions:
- “What shapes did you make? How many sides does each have?”
- “Can you make a pattern with your cookies?”
- “Which cookies are the same? Which are different?”
- “Can you create a picture using your cookie shapes?”
Tips for Success:
- Use multiple colors of playdough to make patterns or designs more engaging.
- Encourage children to count the cookies or talk about attributes while they play.
- Extend learning by having children dictate or write the names of shapes on paper to connect hands-on play with early literacy.
Materials: paper, markers or other writing materials, grocery ads, glue, and scissors
Why this is important:
Writing a Recipe promotes early writing skills, planning, memory, knowledge of quantities and measures, and strengthens fine motor skills. It helps children connect to their culture and family, supporting identity.
How to Play:
During food preparation or mealtimes with your child, talk about how using a recipe to make a food dish is helpful. Discuss what ingredients are, and different types of measurements. Invite them to make their own recipe using ingredients from the grocery ads. They can cut out and glue the various foods they would like to include in their recipe. If they would like to dictate to you what the recipe is called and any measurements or instructions, you can write them exactly as they tell you. This dictation and recipe will be a gift to you for years to come!
Prompting Questions:
- How much of this kind of food is needed?
- Do I need to wash any of these foods?
- How do I mix these foods up?
- Does the recipe require an oven or heat to cook the food? (Great segway to a reminder about safety around an oven, grill, and stove.)
- What is your recipe called?
Tips for Success!
- Have the materials for Writing a Recipe ready before inviting your child to cut and glue the ingredients for their recipe.
- Follow the lead of your child. If they choose Jell-O and ice cream, that’s ok, it’s their recipe.
- Be available for your child if they would like you to write anything for them or dictate to you. It is important to write exactly what they say, so when they ask you to read it back to them (as they likely will), you can read it back to them, giving them positive affirmation and support in their creative process, knowledge of words and language, and the development of sequencing skills.
Materials: An outdoor space that can be visited often during the month of March. Paper, a notebook, or clipboard, and markers, and waterproof places to sit.
Springtime Observations gives children the opportunity to use their senses to discover how plants, weather, and growing cycles are starting to change. As they observe these changes, they begin to understand time, seasons, and connect what elements support the life cycle of plants: food, water, sun, air, and space (area).
Invite your child to visit a spot outdoors with you. Begin to describe what you smell, feel, and see.
“It is wet outside today. The ground looks muddy and I can smell the earth.”
“Everything still looks brown. I wonder when we will begin to see any growing plants?”
Notice how the trees look, the grass, and any garden areas.
Ask your child what they feel, smell, and see? Ask them first to touch the grass. What does it feel like? Dry? Wet? Is the grass yellow and brittle or maybe covered in frost or snow!
Invite your child to draw a picture of the area you are looking at and exploring.
Visit this same outdoor area with your child and notice any changes. Maybe the sun is out and the earth feels warm, or there are buds you can see on the trees. Throughout the month, highlight the changes by asking your child to use their senses and record through drawing what they see.
Prompting Questions:
- Can you feel the wind, or the sun today? What do you think plants can feel?
- Why do plants need water like we do?
- Remember when the earth felt very cool and wet when we visited last time? How does it feel different today? Why?
Tips for Success!
- Check the weather and be prepared with rain gear, hats, or sunglasses to keep you and your child comfortable while doing Springtime Observations.
- Allow enough time for your child to take their time exploring and using their senses.
- Have materials packed and ready to carry in a waterproof bag.
- Don’t forget the snacks and water bottles!
Materials: your child, paper, marker
Let’s Have a Picnic helps your child plan and make decisions, connect written words with objects, and work together with another person.
Talk with your child and ask them if they can help you plan a picnic! Write down all of the suggested food and supplies your child is thinking of.
Give your child a valuable role in setting up the picnic and share a picnic snack.
Prompting Questions:
- Where should we have our picnic? (at home, outside, a favorite park)
- What can you help set up when we get to our picnic spot?
- Is there anything we want to bring when we finish our picnic snack?
- Should we invite anyone to come with us?
Tips for Success!
- Think through which picnic snacks or meal options are available before asking your child to join.
- List which ingredients are okay for a picnic and which will not work.
“Ice cream will likely melt before we get to eat it.” “Let’s think of what a healthy choice for our snack would be. I have some apples or strawberries we could bring!”
- Be sure you write down your picnic plan where your child can see you write and model making a list. Saying what you are writing as you write helps your child make letter-sound connections.
This activity will help your child…
- Build listening comprehension by following multi‑step directions and engaging in conversation throughout the experience
- Practice confidence and pride as they take ownership of planting and caring for a living thing
- Adjust to changes as they observe and respond to what their seed needs over time
Materials:
A recycled paper cup, soil, seeds of your choice, gardening tools and supplies, paper and drawing tools, a designated place in your home for growing
How to try it at home:
Gather all of your materials and talk with your child about what a seed needs to grow. Let them look at and hold the seed, then invite them to draw what they see on paper before planting.
Walk through each step together, identifying what we need to care for seeds so they grow, where we want to put them while they grow, and how we can help the growing process by taking care of the seed.
Here are some prompts to guide your initial investigation:
- “Why do you think the seed needs soil, water, and sunshine to grow?”
- “What do you think will happen first? How will we know when it starts to grow?”
- “What do you need to help you grow?”
When you are ready, begin the planting process following the different steps you talked about. Let your child take the lead as much as possible!
You can guide them with these simple steps:
Step 1: Fill your cup halfway with soil using your spoon or shovel.
Step 2: Use your finger or a pencil to poke a small hole in the middle of the soil.
Step 3: Drop your seed into the hole.
Step 4: Gently cover the seed with soil, like tucking it into a cozy blanket.
Step 5: Add a small amount of water to help the seed wake up.
Step 6: Place your cup in a sunny spot and check on it every day!
As time goes on, encourage your child to observe and care for the plant. They can use paper and art tools to draw or write about what they see. You can prompt their thinking with some of these questions:
- “What changes do you see happening?”
- “How big do you think the plant will get? How can we measure it?”
Transferring your plants to an outdoor environment when ready is an important part of the growing process. Have your child help by picking a good spot outdoors and replanting it when it is time.
Depending on what you grew (vegetables, fruits, flowers) you can have your child harvest the items when ready. You can taste the veggies you grow or create fresh flower bouquets for loved ones!!
Materials: sidewalk chalk (or painter’s tape) and toy vehicles
This activity helps your child learn to recognize and form numbers by tracing them with toy vehicles. Driving along the number while saying its name makes practice feel like play!
Choose a shady, smooth area of pavement that is safe from cars and other outdoor hazards. (If you need to do this inside, use painter’s tape to form the numeral.)
Draw one numeral (0-9) on a smooth, shady pavement.
Add toy cars and other toy vehicles and place them on the line of the numeral you made.
Invite your child to come see what giant number you drew. If they do not recognize it, name the number for them.
“Look at the number I just made. I made it very large so you can drive your vehicles on it.”
(While showing your child, show them how you formed the numeral by tracing your finger over it.) “This is where I started…. Then…and that is the end.”
“Let’s start a car over here where I started. Which one would you like to use?”
(Drive the car in the same way the numeral is formed.)
Continue to “drive” the vehicles over the number and create playful moments with your child!
Prompting Questions:
- Is there another number we could draw on the ground to drive around on? Which number would you like to choose?
- What land do “number roads” exist in? What would the town or city’s name be?
- How many vehicles do we have? How can we add vehicles so they match the numeral?
Materials: Sidewalk chalk or painter’s tape
Walk The Line supports the relationship between family member and child, balance, coordination, core strength, and focus. Add some letters and numbers along the way and you can also embed some core academic skills!
Using sidewalk chalk outdoors on pavement in a safe area or painter’s tape in an open area inside and create a series of lines that your child will need to walk. Think straight, curved, zig-zag, and more!
Take turns walking the lines like on a balance beam with your child. Engage with questions as they explore.
- What can you do to keep balanced and make sure you don’t “fall” off?
- Show me some creative ways you can move across the line (ex. hop, tip toe, giant steps, etc.)
- Can you walk the line really fast? How about super slow?
Add in additional learning by putting letters or numbers along the path and encouraging children to identify or work with the element before moving on. Here are a few examples:
Number Exploration:
Add a dice and some numbers hidden throughout your lines. Have your child roll the dice, identify the number, and walk the line until they find it. Add in a fun movement like jumping jacks to practice counting.
Letter Exploration:
Place hidden letters (or common words if your child is interested in reading) throughout your lines. Direct your child to take a certain number of steps and then pause to look at/identify the letter (or word) they stopped at.
Ex. “Take three GIANT steps to the next letter. What letter did you stop at? Can you say the sound of that letter? What word do you know that starts with that letter?” Repeat until they have reached the end of that line.
Tips for Success!
- Set up and make the tape line(s) before inviting your child to walk the line.
- Model what to do using slow movements and stretching out your arms (if needed).
- Talk with children through the experience. Use descriptive words and an encouraging tone of voice.
- Follow the lead of your child by supporting what they decide to do with the materials.
Materials: plastic cups, dice, small manipulatives (toys, nature items, etc.)
Fill Up the Cup fosters children’s number sense, counting, subitizing, and comparing sizes while building relationships and having fun!
Set out various small toys or small natural items, cups, and dice on the table. Invite your child over to play with you. The goal is for each player to roll their dice and then fill their cup with that number of manipulatives. The first to fill their cup “wins”!
Before you start, review the numbers on the dice with your children, counting the dots on each side. You can tailor this to their current number knowledge.
Each player takes a cup and a die, when ready start to roll. Quickly recognizing the number you rolled, fill your cup with the appropriate number of manipulatives. Roll again and keep adding!
Once you’ve filled your cups, talk about how many pieces were needed to reach the top. Ask questions to engage:
- How many items did you have in your cup altogether?
- Why might yours have more or less than mine but still be full?
- (After each roll) Now how many do you have in your cup?
- Let’s roll again and this time we will take away (subtract) the number that we roll until our cup is empty!
Tips for Success!
- Choose a comfortable place for this activity without distractions (be mindful of not having a phone or television nearby).
- Talk with children through the experience. Use descriptive words and an encouraging tone of voice.
- Follow the lead of your child by supporting their current abilities and number knowledge.